Putting an aloe into a pot? How to plant succulents covers the hole and the mix. Everyday light and the dry-down check stay on this page. The wider routine is indoor plant care.
YOUR SIMPLE GROWING PLAN
One pot. Here’s the plan.
Before you start Start with a labeled Aloe vera in a draining 4–6-inch nursery pot. Choose bright indoor light, introduce stronger sun gradually, and let the mix dry through between waterings.
What you need · pot, mix & supplies
- 1 labeled Aloe vera in a draining 4–6-inch nursery pot
- A saucer or an outer pot you can empty
- A watering can; optional ⅛-teaspoon measure for a later spring feed
The soil
Keep the nursery mix if it drains and dries properly. At repotting, choose a bag labeled cactus and succulent potting mix. Do not use garden soil or a sealed glass planter.
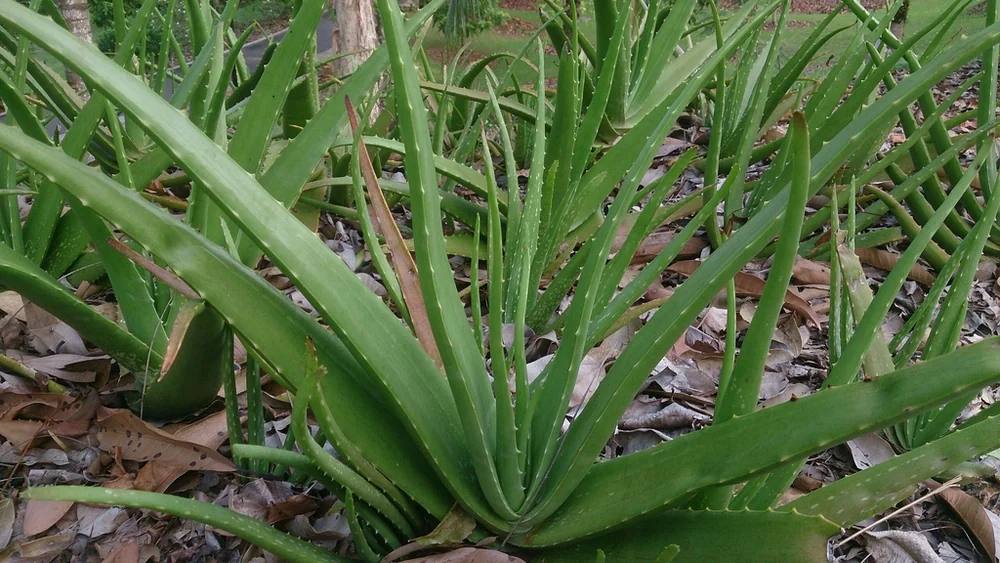
Is this your plant? Look for Aloe vera or the synonym Aloe barbadensis on the label. Other aloes, agaves, and haworthias can look similar; this indoor plan is for true Aloe vera.
Indoors, near a bright window with space for spreading leaves. Start with nursery plant.
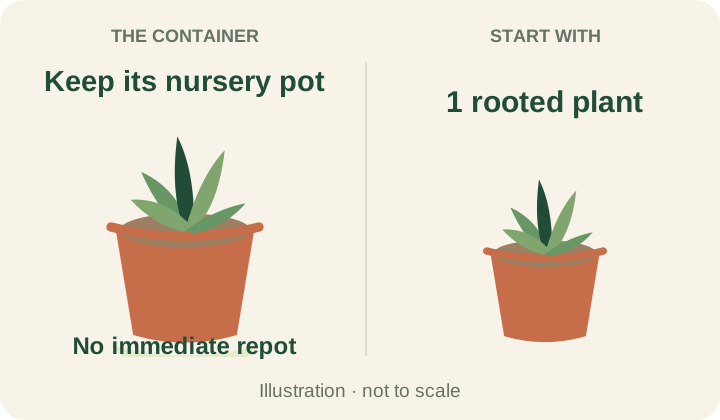
This starter plan uses one small plant in a draining 4–6-inch-wide nursery pot. Keep it while roots have room and the mix drains; buying aloe is not a reason to repot it immediately.
Buy a plant labeled Aloe vera or its synonym Aloe barbadensis. Choose firm leaves and a stable plant without a soft, wet base.
See the planting illustration
- 01
Keep the draining pot
Check for an open drainage hole. Remove any sealed wrapper and empty the outer pot. Keep a healthy plant in its nursery pot while it settles in.
- 02
Choose a bright window
Give it bright indirect light near a sunny window. If it came from a dim shop, move it into stronger light gradually over 1–2 weeks. Avoid a sudden move onto a hot, exposed windowsill.
- 03
Check the whole pot
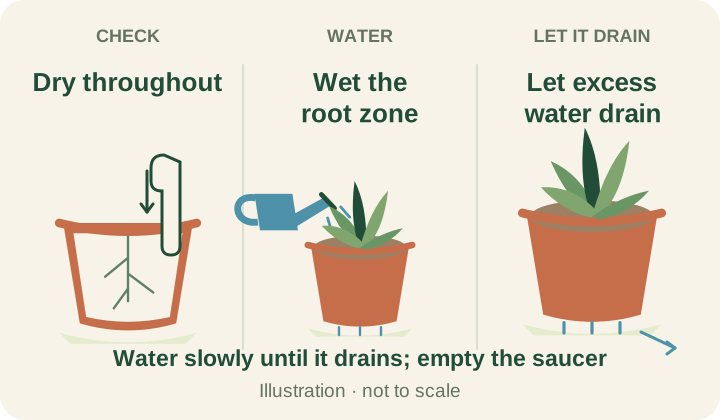
Use a weekly reminder to check, not to water. Feel below the surface and lift the pot. If deeper mix is damp or the pot still feels heavy, wait and check again.
- 04
Water, then let it dry
When the mix has dried through, wet the root ball slowly until the pot drains. Empty the saucer. Wait for the mix to dry again before the next drink.
Other ways to start
Start with a rooted pup+
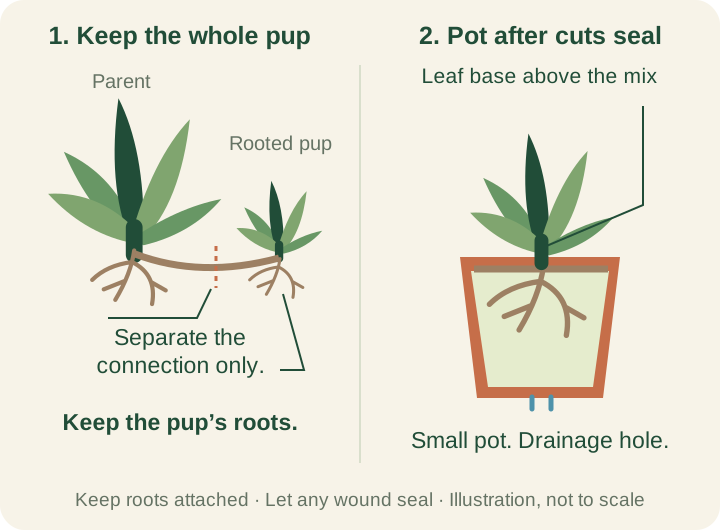
A pup is a small whole plant growing beside the parent. Choose one with its own roots. Gently separate it during repotting, keeping those roots attached. If you must cut the connection, use a clean sharp blade and let the wound dry and seal before potting. The diagram below shows what to keep.
Skip the single-leaf shortcut+
For this beginner plan, choose a nursery plant or a rooted pup. Iowa State lists division for aloe; a detached fleshy leaf is not a dependable shortcut to a new plant. Seed is possible but slower and less convenient indoors.
A pup has leaves, a base, and roots.
YOUR EVERYDAY ROUTINE
Water & fertilizer at a glance.
- Water when
- Check weekly. Wait until the mix has dried through; wet the roots, drain, and empty the saucer.
- Fertilizer
- Miracle-Gro Water Soluble All Purpose Plant Food (US 24-8-16)
- Amount
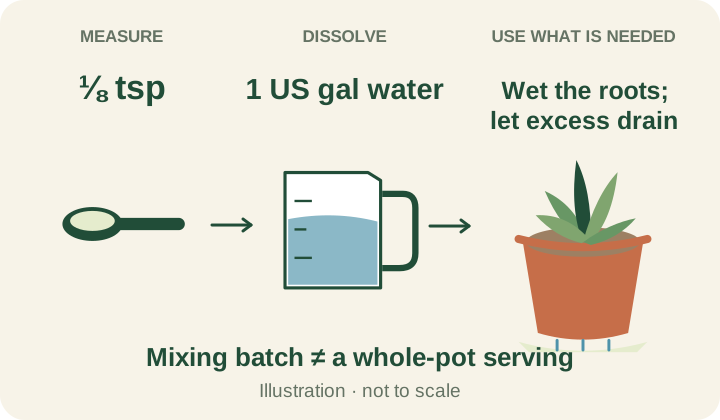
- ⅛ teaspoon in 1 US gallon of water
- What that amount covers
- Mix into water. Apply only enough solution to wet this pot and drain; the mixing batch is not the amount to pour on.
- How often to feed
- Optional: one light feed in spring while actively growing.
- When to start or pause
- Usually no extra feed is needed. Wait until existing fertilizer ends; skip newly divided or repotted plants, struggling roots, and winter rest.
One-quarter of the product’s indoor concentration. This optional starter routine is lighter and less frequent than its standard schedule.
Product directions ↗Give the optional spring feed only at a watering the plant actually needs.
Use level measures and the exact US formula shown. If your label differs, follow it; do not transfer this dose to another formula or combine feeding programs.
See the watering & feeding illustrations

US PRODUCT REFERENCE
Miracle-Gro
Water Soluble All Purpose
24-8-16Soluble: mix into water
Check the official US product ↗Illustrated reference; check the manufacturer’s current packaging and US label.
New leaves, pups, and possible flowers
Look for firm new leaves from the center over time. A mature plant may make small pups beside its base. Indoor flowers are a bonus rather than a care milestone; do not add fertilizer just to force a bloom.
Starting indoors and choosing a repotting season
You can buy a rooted plant indoors year-round. Repotting or separating pups is easiest in spring or early summer. Keep aloe away from freezing windows and cold drafts. If you take it outdoors in summer, wait for settled warm weather and introduce outdoor light gradually; bring it back before cold weather.
For regional planting windows, find your local Cooperative Extension office ↗.
Something looking off?
How often should I water aloe vera?+
Water only when the mix is dry through most of the pot, then drain fully. In low light or cool rooms this may be every few weeks. Soft mushy leaves often mean overwatering.
How much light does aloe need?+
Bright light is best; a sunny window helps. Dim corners cause stretching. Ease into strong direct sun to avoid scorch.
When can I separate aloe pups?+
Wait until pups have several leaves and their own roots. Unpot gently, cut or tease pups free, and pot in draining succulent mix.
Why are my aloe leaves soft or yellow?+
Often overwatering, poor drainage, or low light. Check the roots and let the mix dry; move to brighter light if the plant is stretching.
Can I grow aloe vera in water?+
This guide keeps aloe in a draining soil mix. Water culture is not the beginner method here and raises rot risk for typical houseplant setups.
Repotting and growing a rooted pup
Repot when roots need room
Check the roots if the plant becomes crowded, unstable, or difficult to water and drain. Choose a pot just large enough for them. For a crowded 4–6-inch starter pot, about 1 inch wider is a modest next step. Use drainage holes and fresh succulent mix. Keep the base where the leaves meet at its previous level; cover the roots without burying the lower leaves.
Pot and settle a rooted pup
Use a draining pot that fits the pup’s roots, with little unused mix around them. If separation made a wound, leave it dry in a bright, sheltered place until sealed; Arizona Extension allows about a week. Then pot it in succulent mix at its old depth and water lightly to settle it. Let the mix dry between later waterings. Wait for established new growth before considering fertilizer.
Help with your next step.
- Check soft roots before you water again
A limp aloe in wet mix needs drainage and time, not more water.
- Check the light at the spot
Aloe wants bright light. A dark shelf will not be fixed with fertilizer.
Sources, dates & detailed PDF
Editorial plans, not results from a Plant Care Steps growing trial. Compiled with AI assistance; they have not yet had an independent horticultural review. Editorial approach.
- NC State: Aloe vera identity, dry-between-waterings care, and ingestion caution ↗
- South Dakota State: indoor aloe light, water, and low fertilizer needs ↗
- Iowa State: succulent pots, drying checks, and reduced fertilizer strength ↗
- Iowa State: offsets with roots and succulent propagation methods ↗
- Arizona Extension: light spring feeding and letting cut pups seal ↗
- Minnesota Extension: easing houseplants into brighter light ↗
- RHS: choosing the next pot and keeping stems at the right level ↗
- RHS: Aloe vera offsets in spring or early summer ↗
- Manufacturer: US fertilizer formula and application directions ↗
Something needs updating? Suggest a correction
Published · Updated
Sources checked View sources ↗
Detailed PDF ↓Full reference edition with expanded explanations and illustrations. Its publication dates appear in the file.